Imagine the vibrant, peppery aroma of fresh basil filling your kitchen as you prepare a sauce. Picture yourself snipping a few sprigs of mint for a refreshing drink on a warm evening. This sensory, flavorful experience is a simple luxury that connects us to our food in a profound way. For many, this freshness is a rare treat, quickly replaced by the dusty, muted flavors of herbs from a jar. But what if you could have that burst of living flavor at your fingertips every single day? Learning how to create a small space herb garden is the key to unlocking this world of freshness, and it’s one of the easiest and most rewarding things you can do for your home and your palate.
You don’t need a sprawling yard or a green thumb honed by years of experience. A sunny windowsill, a small corner of your balcony, or even a spot on your kitchen counter can be transformed into a lush, fragrant, and productive garden. This guide will walk you through everything you need to know—from choosing the perfect herbs and pots to understanding the secrets of light and water—to cultivate your own corner of culinary paradise.
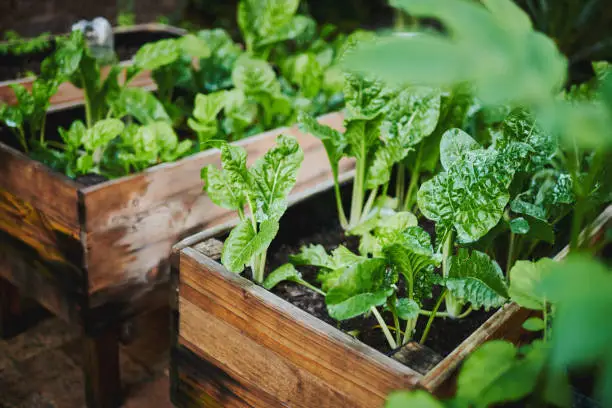
Table of Contents
The Simple Joys of a Personal Herb Garden
Before we dig into the details, let’s celebrate why an herb garden is such a perfect fit for a mindful, “unplugged” lifestyle.
- Unbeatable Culinary Flavor: There is simply no comparison between fresh and dried herbs. Homegrown herbs are bursting with essential oils, providing a depth and brightness of flavor that can elevate any dish from ordinary to extraordinary.
- A Smart Financial Choice: A single plastic clamshell of fresh basil from the grocery store can be expensive. For the same price, you can buy a starter plant that will provide you with fresh basil for an entire season.
- Daily Dose of Wellness: The act of tending to your herbs is a form of active meditation. The aromas of herbs like rosemary and mint have been shown to have therapeutic benefits, reducing stress and improving focus.
- Living, Fragrant Decor: An herb garden is a beautiful addition to any home. It adds a touch of living greenery, purifies the air, and releases a gentle, natural fragrance into your space.
Step 1: Assess Your Space (Light is Everything)
The absolute number one key to a thriving herb garden is sunlight. Most herbs are sun-worshippers. Before you do anything else, become an observer of the light in your home.
Understanding Light Levels
- Full Sun (6-8+ hours of direct sun): This is the ideal condition for robust, woody Mediterranean herbs. A south-facing or unobstructed west-facing window or balcony is your prime real estate for these.
- Bright, Indirect Light or Part Sun (4-6 hours of sun): This is perfect for more tender, leafy herbs that can get scorched by intense afternoon sun. An east-facing window that gets gentle morning sun is often perfect.
- Low Light (Less than 4 hours): While challenging, a few hardy herbs like mint and parsley might survive, but they won’t thrive. If this is your only option, investing in a small LED grow light is a game-changer.
Prime Locations in a Small Home
- The Sunny Windowsill: This is the classic and often best location. A kitchen windowsill is ideal, keeping your herbs within arm’s reach while you cook.
- The Balcony or Patio: If you have any outdoor space, you can grow a wider variety of herbs in larger pots.
- The Kitchen Counter: With the aid of a stylish countertop grow light, you can turn any corner into a productive herb station.
- A Vertical Wall Planter: If floor and counter space are nonexistent, think vertically! A wall-mounted planter can turn a blank, sunny wall into a living work of art.
Step 2: Gearing Up with the Right Supplies
You don’t need a lot of gear to get started. Focusing on a few quality basics will set you up for success.
Containers with Character (and Drainage!)
This is the most important rule: every pot must have a drainage hole in the bottom. Without it, water will pool and rot your herbs’ roots.
- Terracotta (Clay) Pots: The top choice for herbs. The porous clay allows the soil to breathe and dry out, which most herbs love. They are classic, beautiful, and inexpensive.
- Glazed Ceramic or Plastic: These are great options, but they hold more moisture. You’ll need to be more careful not to overwater.
- Window Boxes: Perfect for creating a mixed herb garden right on your windowsill. You can plant 3-4 different herbs in a single container.
The Perfect Potting Mix
Never use soil from your garden. It’s too heavy and won’t drain properly in a pot. You need a high-quality potting mix. For herbs, look for a mix that is extra light and drains quickly. You can often find mixes specifically for cacti and succulents, which are also excellent for Mediterranean herbs that hate “wet feet.”
Essential Tools of the Trade
- A Good Watering Can: One with a long, thin spout is ideal for delivering water directly to the soil without splashing the leaves.
- Sharp Scissors or Herbal Snips: For harvesting. A clean cut is healthier for the plant and makes your job in the kitchen easier.
Step 3: The 10 Best Herbs to Create a Small Space Herb Garden
Here are ten of the most popular, resilient, and delicious herbs that are perfectly suited for container life.
The Sun-Worshipping Mediterranean Classics
These herbs need at least 6 hours of direct sun and prefer to dry out between waterings.
If choosing individual pots, seeds, and soil feels a bit overwhelming, an indoor herb garden starter kit is a fantastic way to begin. These kits come with everything you need in one box, taking all the guesswork out of the process.
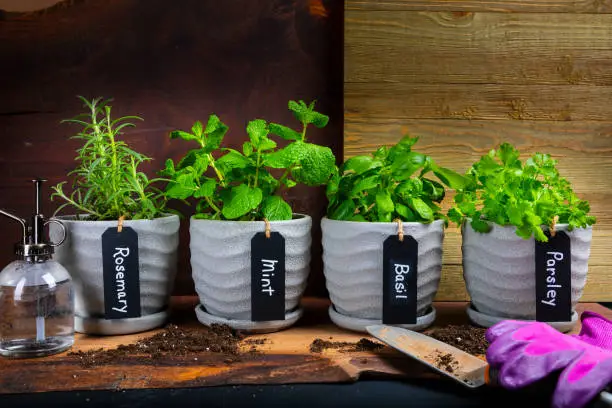
1. Rosemary
- Flavor: Piney, woody, and intensely aromatic.
- Care: The easiest way to kill rosemary is by overwatering. Use the “finger test” and only water when the soil is completely dry. A terracotta pot is its best friend.
- Harvesting: Snip off the top 2-3 inches of any spring. Regular pruning will encourage a bushier shape.
2. Thyme
- Flavor: Earthy, minty, and slightly floral. A versatile kitchen staple.
- Care: Very drought-tolerant. It has a low-growing, sprawling habit, making it perfect for the edge of a pot or window box.
- Harvesting: Snip the top few inches of any stem. The stems are woody, so you’ll want to strip the leaves off before cooking.
3. Oregano
- Flavor: The bold, peppery flavor essential to Italian and Greek cuisine.
- Care: A hardy and aggressive grower. Like thyme, it will happily spill over the sides of its container.
- Harvesting: Trim stems back regularly to promote new growth. The flavor is most intense right before the plant flowers.
4. Sage
- Flavor: Earthy, slightly peppery, with hints of mint.
- Care: Loves sun and well-draining soil. Its beautiful, silvery-green leaves add great texture to a mixed pot.
- Harvesting: Pluck individual leaves as needed or snip entire stems.
The Eager-to-Please Kitchen Favorites
These herbs are a bit more tolerant of less sun (4-6 hours) and appreciate more consistent moisture.
5. Basil
- Flavor: The sweet, peppery king of summer herbs.
- Care: Basil loves heat, sun, and consistent water. It will wilt dramatically when thirsty but perks right back up after a drink.
- Harvesting: This is crucial! Never just pluck individual leaves. Pinch or snip the stem right above a set of two side leaves. This forces the plant to branch out, creating a full, bushy plant.
6. Mint
- Flavor: Sweet, cool, and refreshing.
- Care: The easiest herb to grow. It is so vigorous that it must be planted in its own pot, otherwise it will choke out any neighbors.
- Harvesting: Snip stems freely. The more you cut, the more it will grow.
7. Parsley (Flat-Leaf or Curly)
- Flavor: Bright, grassy, and fresh. Flat-leaf has a more robust flavor, while curly is a beautiful garnish.
- Care: Appreciates consistent moisture and does well with morning sun and some afternoon shade.
- Harvesting: Harvest the outer stems first, cutting them at the base of the plant. This encourages new growth from the center.
8. Chives
- Flavor: A delicate, mild onion flavor.
- Care: Incredibly easy and forgiving. They will grow in almost any light condition (though they prefer sun).
- Harvesting: Use scissors and give them a “haircut,” snipping the green tops about two inches from the base. They will regrow endlessly.
9. Cilantro
- Flavor: Bright, citrusy, and a bit peppery.
- Care: This herb loves cooler weather. In the heat of summer, it is quick to “bolt” (send up a flower stalk and stop producing tasty leaves).
- Harvesting: Harvest the outer leaves regularly. For a continuous supply, plant a new batch of seeds every 3-4 weeks.
10. Dill
- Flavor: A unique, tangy flavor with hints of celery and anise.
- Care: Can get tall and feathery. It may need a small stake for support. Like cilantro, it prefers cooler weather.
- Harvesting: Snip the delicate fronds as needed. If you let it flower, you can also harvest the seeds (dill seed) for pickling.

Step 4: Your New Routine – Care and Harvesting
Planting: Seeds or Starters?
For beginners, buying small starter plants from a nursery is the easiest way to guarantee success. You get a head start and can begin harvesting much sooner. Look for plants with healthy, vibrant green leaves and no signs of pests.
Watering Wisely
The “finger test” is your best friend. Stick your finger two inches into the soil. If it’s dry, it’s time to water. If it’s damp, wait another day. Most herbs would rather be a little too dry than a little too wet.
The Art of the Harvest
Don’t be shy! Regular harvesting is like a haircut for your herbs—it encourages them to become fuller and more productive. The general rule is to never remove more than one-third of the plant at any given time.
Your Culinary Oasis Awaits
To create a small space herb garden is to give yourself the gift of freshness, fragrance, and flavor. It’s a simple, rewarding routine that connects you to your food and beautifies your home. Start with one or two of your favorite herbs, place them in a sunny spot, and enjoy the process of watching them grow. The satisfaction of cooking a meal seasoned with herbs you grew yourself is a simple, profound joy that everyone deserves to experience.
What is the first dish you dream of making with your new homegrown herbs? Share your delicious plans in the comments below!
Greetings! Very helpful advice on this article! It is the little changes that make the biggest changes. Thanks a lot for sharing!
That’s wonderful to hear! I’m so glad you found the advice helpful.
Hello my family member! I wish to say that this article is amazing, nice written and come with approximately all significant infos. I’d like to see more posts like this .
Thanks for another great post. Where else could anybody get that kind of information in such an ideal way of writing? I have a presentation next week, and I am on the look for such information.
I consider something genuinely special in this website.
Thank you so much.