Learning how to harvest and store urban garden produce is the final, joyful step in your gardening journey. It’s the moment all your hard work—the potting, the watering, the patient waiting—pays off. The crisp snap of a freshly picked bean, the intoxicating aroma of basil snipped in the morning sun, the heft of a ripe tomato warm from the vine; this is the ultimate reward. It’s a profoundly satisfying, “unplugged” moment that connects you directly to the food you eat.
But this joyful moment can also be tinged with uncertainty. How do you know exactly when a pepper is ready? If you pick lettuce, will it grow back? And once you bring your small but precious bounty inside, what’s the best way to keep it fresh in a city-sized kitchen? The fear of harvesting too early, too late, or letting your hard-won produce wilt in the fridge is real.
This guide is here to replace that uncertainty with confidence. We will walk you through the art of the perfect harvest for common urban garden crops and provide simple, space-savvy storage and preservation techniques. It’s time to savor the fruits of your labor and ensure that not a single delicious leaf or berry goes to waste.
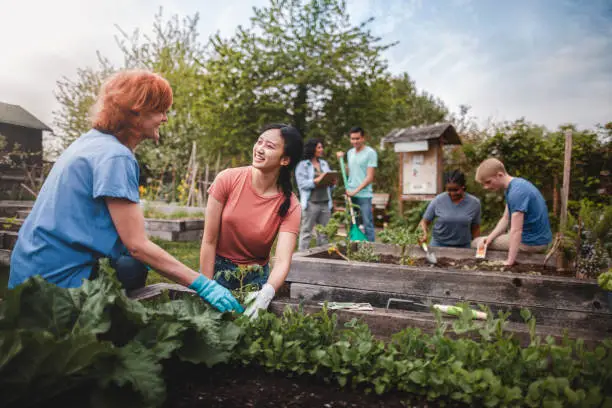
Table of Contents
The Art of the Harvest: Three Universal Principles
Before we get to specific crops, a few universal rules will set you up for success.
- Harvest in the Morning: If possible, the best time to harvest most produce, especially leafy greens and herbs, is in the cool of the early morning. The plants are fully hydrated, crisp, and their essential oils (which create flavor) are at their peak. Harvesting in the heat of the day can lead to limp, stressed-out produce.
- Use Clean, Sharp Tools: While some things are satisfying to pick by hand, using clean tools is a better practice. A sharp pair of pruning shears or herb snips will make a clean cut, causing less damage to the parent plant and helping it recover more quickly. Wiping your blades with rubbing alcohol between plants can also prevent the spread of any potential diseases.
- Harvest Often: For many plants, regular harvesting is a signal to produce more. This is especially true for herbs, leafy greens, beans, and zucchini. Frequent, smaller harvests are often better than waiting for one massive haul.
When to Pick? A Crop-by-Crop Harvesting Guide
Knowing the signs of peak ripeness is part science, part art. Here’s how to tell when your container crops are ready.
Leafy Greens (Lettuce, Spinach, Kale, Arugula)
These are the champions of the “cut-and-come-again” method, which allows for multiple harvests from the same plant.
- When to Harvest: Don’t wait for a full head of lettuce to form like you see in the grocery store. Start harvesting once the outer leaves reach a usable size (around 4-6 inches long). The key is to harvest before the plant “bolts,” which is when it sends up a central flower stalk. Bolting causes the leaves to become bitter.
- How to Harvest: Using scissors or your fingers, snip the outermost leaves from the base of the plant. Leave the central, younger leaves (the crown) intact. The plant will continue to produce new leaves from the center, giving you a continuous supply.
- Pro Tip: For a full head of romaine or buttercrunch lettuce, wait until the head feels firm and well-formed. Harvest the entire plant by slicing it off at the base, just above the soil line.
Herbs (Basil, Mint, Parsley, Cilantro, Rosemary)
Like leafy greens, regular trimming encourages herbs to become bushier and more productive.
- When to Harvest: The best flavor is in the leaves before the plant flowers. Start snipping leaves as soon as the plant is established and has plenty of foliage. For herbs like basil and mint, harvesting often is essential to prevent them from flowering and going to seed.
- How to Harvest: On leafy herbs like basil and parsley, trim stems just above a set of two leaves. This will encourage the plant to branch out from that point. For woody herbs like rosemary and thyme, you can snip off the top 2-3 inches of any mature stem. Never take more than one-third of the entire plant at any single time.
- Pro Tip: If you see flower buds forming on your basil, pinch them off immediately to prolong the harvest and keep the leaves tasting sweet.
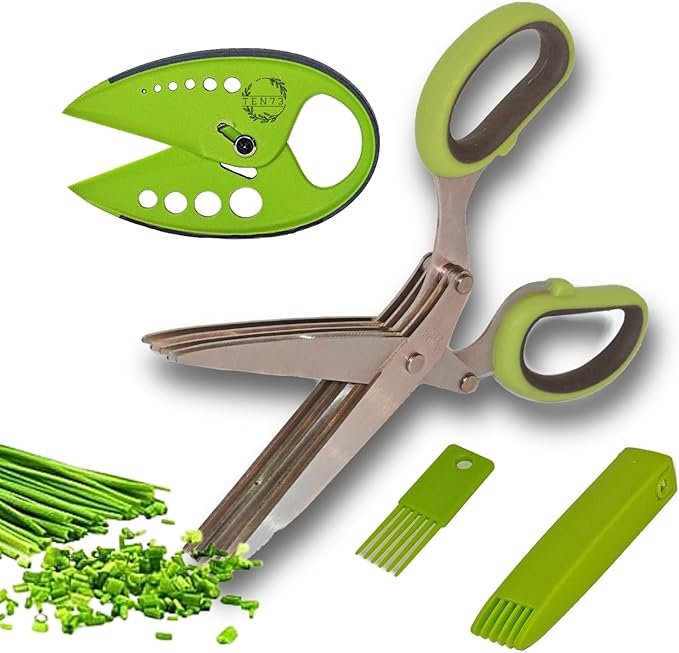
To make quick work of harvesting and prepping your herbs, consider investing in a pair of Multi-Blade Herb Scissors. You can find options on Amazon that have five blades, allowing you to snip and chop your basil, parsley, and chives five times faster, which is incredibly useful when preparing them for freezing or drying.
Fruiting Vegetables (Tomatoes, Peppers)
For these sun-lovers, color is your best guide, but feel is just as important.
- Tomatoes:
- When to Harvest: The tomato should be fully colored (a deep red, a vibrant orange, etc., depending on the variety) and firm, but with a slight give when gently squeezed. It should smell fragrant and earthy at the stem.
- How to Harvest: Gently hold the fruit and twist the stem until it snaps, or use pruning shears to snip the small stalk connecting the fruit to the main vine. For cherry tomatoes, you can often harvest an entire cluster or “truss” at once.
- Peppers (Bell Peppers & Hot Peppers):
- When to Harvest: Bell peppers can be harvested when they are green and full-sized, but their flavor will be sweeter and their vitamin C content higher if you let them ripen to their final color (red, yellow, or orange). Hot peppers can be harvested once they reach their mature color, or you can let them stay on the plant longer to intensify their heat.
- How to Harvest: Use pruning shears to snip the stem about a half-inch from the fruit. Pulling peppers off by hand can damage the entire branch.
Root Vegetables (Radishes, Carrots)
Harvesting root vegetables can feel like a treasure hunt since the prize is hidden underground.
- When to Harvest: Check the seed packet for the approximate “days to maturity” as a guideline. The best visual cue is the diameter of the “shoulders” of the root just at the soil line. For radishes, you want them to be about 1 inch across. For carrots, look for a diameter of about ½ to 1 inch. You can gently brush away some soil to peek.
- How to Harvest: Grasp the leafy tops firmly and pull straight up with a slight twisting motion. If the soil is compacted, gently loosen it with a hand fork first to avoid snapping the root.
- Pro Tip: Don’t let them get too big! Overly mature radishes can become woody and spicy, and large carrots can be tough.
Vining Crops (Cucumbers, Zucchini)
For these prolific producers, the secret is to harvest them when they are young and tender.
- When to Harvest: Don’t wait for them to reach the size of a baseball bat! Zucchini are best when they are 6-8 inches long. Pickling cucumbers are ready at 3-4 inches, while slicing varieties are best at 6-9 inches. The skin should be glossy; a dull or yellowish skin means the fruit is overripe and full of seeds.
- How to Harvest: Like peppers, these crops have tender vines. Always use a sharp knife or pruning shears to cut the stem connecting the fruit to the plant.
Short-Term Storage: Keeping Your Harvest Crisp and Fresh
You’ve brought your beautiful produce inside. Now what? Proper storage, even for just a few days, makes all the difference.
The “Bouquet” Method for Tender Herbs
Herbs like parsley, cilantro, and mint will wilt quickly. Treat them like a bouquet of fresh flowers.
- How to Do It: Snip off the very bottom of the stems. Place the bunch in a jar or glass with about an inch of water. Cover the leaves loosely with a plastic bag and store in the refrigerator. They will stay fresh for over a week. For basil, do the same but leave it on the kitchen counter, as the cold of the fridge will turn its leaves black.
The Paper Towel Trick for Leafy Greens
The enemy of leafy greens is excess moisture, which leads to slimy, rotten leaves.
- How to Do It: Wash your lettuce, spinach, and kale in cold water and dry them thoroughly in a salad spinner or by patting them dry. Loosely wrap the dry leaves in a paper towel, place them in a zip-top bag or airtight container, and store them in the crisper drawer of your fridge. The paper towel will absorb any excess moisture.
To Refrigerate or Not to Refrigerate?
Not all produce belongs in the cold.
- Store on the Counter (Cool & Dry):
- Tomatoes: Refrigeration destroys the flavor and texture of tomatoes, making them mealy. Keep them on the counter and eat them within a few days of harvesting.
- Peppers: Can be stored on the counter for a few days or in the fridge’s crisper drawer for longer life.
- Store in the Fridge:
- Carrots & Radishes: Immediately trim off the leafy green tops, as they will continue to pull moisture and nutrients from the root. Store the roots in the crisper drawer.
- Cucumbers & Zucchini: Store unwashed in the crisper drawer.
Long-Term Storage: Simple Preservation for City Kitchens
When you have a bumper crop of herbs or peppers, simple preservation techniques can extend the taste of your garden for months.
Freezing: The Easiest Preservation Method
Freezing is fast, easy, and preserves a remarkable amount of flavor.
- Freezing Herbs: Finely chop herbs like parsley, chives, or cilantro and pack them into an ice cube tray. Top with either water or olive oil and freeze. Once solid, pop the cubes out and store them in a freezer bag. You can drop a cube directly into soups, stews, or sauces all winter long. For rosemary and thyme, you can freeze the sprigs whole on a baking sheet before transferring to a bag.
- Blanching and Freezing Vegetables: For produce like green beans or sliced zucchini, you can blanch them first. Briefly boil them for 2-3 minutes, then immediately plunge them into an ice bath to stop the cooking process. Dry thoroughly and freeze in a single layer on a baking sheet before bagging.
Drying: The Ancient Art of Dehydration
Drying is the classic way to preserve herbs and hot peppers, concentrating their flavor.
- How to Air-Dry: Tie sturdy herbs like rosemary, thyme, or oregano into small bundles with twine. Hang them upside down in a warm, dry, well-ventilated area away from direct sunlight. They are ready when the leaves are brittle and crumble easily.
- How to Dry Hot Peppers: Use a needle to thread strong string through the stems of hot peppers like cayenne, creating a beautiful and functional “ristra.” Hang it in a dry place until the peppers are shriveled and hard.
Simple Infusions: Creating Flavored Oils & Vinegars
This is a simple, elegant way to preserve the essence of your favorite herbs.
- How to Do It: Gently bruise a few sprigs of a clean, dry herb like rosemary or thyme. Place them in a clean glass bottle and top with good quality olive oil or white wine vinegar. Let it infuse in a cool, dark place for 1-2 weeks, then strain out the herbs if you wish. These make fantastic gifts!
Savor Every Last Bite
The journey from seed to pantry is one of the most rewarding experiences you can have. To harvest and store urban garden produce correctly is to honor the time, energy, and care you’ve poured into your plants. It’s the final, crucial act of a mindful routine that nourishes you, body and soul. By learning these simple techniques, you ensure that the vibrant, sun-ripened taste of your garden can be enjoyed for as long as possible.
What was the first thing you harvested from your garden this season? Share your proudest moments and favorite ways to use your produce in the comments below!