These indoor gardening lighting tips are for anyone who has ever looked longingly at a lush, sun-drenched plant on social media and then glanced sadly at their own dark, city apartment window. The deep, human desire to nurture green, living things often collides with the reality of urban living: buildings that block the sun, north-facing windows, and rooms that never seem to get enough natural light. This can lead to the frustrating experience of bringing home a beautiful plant only to watch it become pale, leggy, and sad.
But what if light wasn’t a limitation? What if it was just another tool you could provide, as simple as water or soil?
The world of artificial lighting can seem intimidating, full of confusing acronyms and technical jargon. But at its core, it’s about one simple thing: providing the energy your plants need to thrive. This guide will demystify the process completely. We’ll translate the science into simple, actionable steps, turning the complex topic of lighting into a mindful part of your “unplugged routine” of plant care. Lack of a sunny window is no longer a barrier; it’s an opportunity to create your own perfect pocket of sunshine.
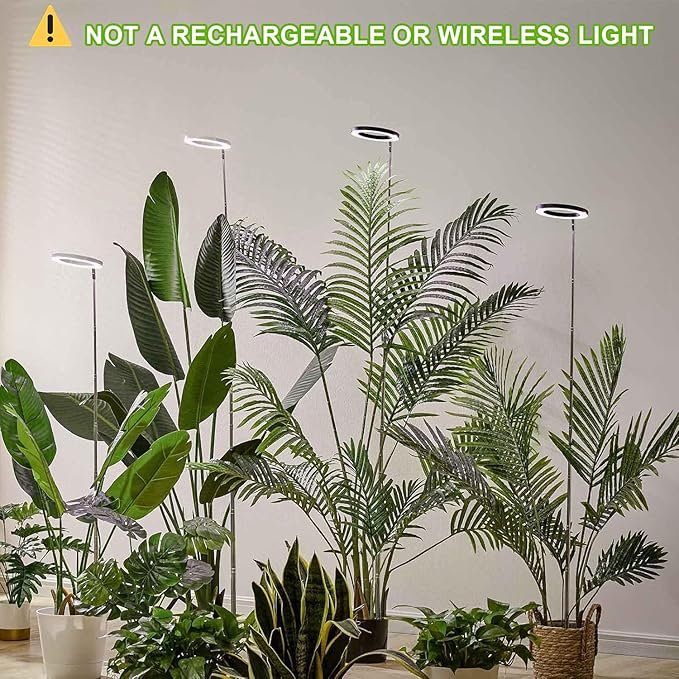
Table of Contents
Why Light is the Most Important Ingredient of All
Before we dive into the tips, it’s crucial to understand why light is the one thing your plants absolutely cannot live without.
It’s More Than Just Illumination; It’s Food
You can give a plant the best soil, the perfect amount of water, and a beautiful pot, but without adequate light, it will starve. Plants use a process called photosynthesis to convert light energy into chemical energy—in other words, food. The chlorophyll in their leaves absorbs photons from light and uses that energy to create sugars, which fuel all of their growth, from new leaves to beautiful flowers.
The Sad Signs of a Light-Starved Plant
An under-lit plant will give you clear signals that it’s in trouble. Learning to spot them is the first step in fixing the problem.
- “Leggy” Growth (Etiolation): Stems become long, thin, and stretched out, with large gaps between the leaves. The plant is literally reaching and stretching in a desperate search for a light source.
- Pale or Yellowing Leaves: New leaves may come in a pale green, and older leaves, especially at the bottom of the plant, may turn yellow and drop off as the plant conserves energy.
- Loss of Variegation: In plants with multi-colored leaves (like a variegated Monstera), the beautiful white or pink patterns may fade, with new leaves reverting to solid green as the plant tries to maximize its chlorophyll content.
- Leaning: The entire plant will noticeably lean or bend in one direction—toward the nearest window or light source.
- No New Growth: A plant that has simply stopped growing or producing new leaves for a long period is often in a state of light-deprived hibernation.
Tip 1: Master Your Natural Light First
Before you spend a dollar on a grow light, the first of our indoor gardening lighting tips is to become an expert on the natural light you already have.
“Read” Your Windows: A Quick Guide
The direction a window faces in your home has a massive impact on the intensity and duration of the light it provides.
- South-Facing Windows: These are the gold standard. They receive the strongest, most direct light for the longest portion of the day. They are perfect for sun-lovers like succulents, cacti, and citrus trees.
- West-Facing Windows: These get a long period of very strong, direct afternoon and evening sun, which can be quite hot. They are great for most houseplants, but delicate plants may need to be pulled back a few feet to avoid scorched leaves.
- East-Facing Windows: These provide several hours of bright, direct morning light that is much gentler than afternoon sun. This is the ideal location for many popular tropical plants like ferns, Calathea, and orchids that need bright, indirect light.
- North-Facing Windows: These windows receive the weakest, most indirect light and never get direct sunbeams. While it may seem like a death sentence, this is the perfect spot for classic low-light plants like Snake Plants, ZZ Plants, and Pothos.
Simple Tricks to Maximize What You Have
- Keep Windows Clean: A dirty window can reduce the amount of light passing through by a surprising amount.
- Use Mirrors and Light Colors: Placing a mirror on a wall opposite a window can literally bounce light deeper into a room. Light-colored walls also reflect more light than dark ones.
- Rotate Your Plants: Give your plants a quarter turn once a week to ensure all sides get some time facing the light, promoting even growth.
Tip 2: Decode Grow Lights and Understand the Basics
When natural light isn’t enough, it’s time to bring in reinforcements. But not all light is created equal.
Why Your Desk Lamp Won’t Work
Standard household light bulbs, especially old incandescent ones, are terrible for plants. They produce a lot of heat (which can scorch leaves) and their light spectrum is very heavy in the red and orange range, which isn’t what plants need for healthy vegetative growth.
Full-Spectrum is the Gold Standard
The solution is a full-spectrum LED grow light. “Full-spectrum” simply means the light emits a balanced range of wavelengths that mimic natural sunlight, including the blue and red light that plants need most for photosynthesis. Modern LEDs are fantastic because they are highly energy-efficient, run cool to the touch, and have a very long lifespan.
Understanding the Numbers (The Simple Version)
You might see terms like Lumens, Kelvin, and PAR on packaging. Here’s what they mean for you:
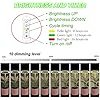
- Kelvin (K): This describes the color temperature of the light. A lower Kelvin (2700K) is a “warm” reddish light, while a higher Kelvin (6500K) is a “cool” bluish-white light that closely mimics daylight. For general plant growth, aim for a light in the 5000K to 6500K range.
- Lumens: This measures the brightness of the light as perceived by the human eye. While a higher lumen count is generally better, it’s not the most important metric for plants.
- PAR (Photosynthetically Active Radiation): This is the holy grail of plant lighting metrics. It measures the actual amount of light available to the plant for photosynthesis. You often only see this listed on more professional-grade lights, but it’s the most accurate measure of a grow light’s effectiveness.
Tip 3: Choose the Right Grow Light for Your Space
Grow light technology has come a long way. You can now find options that are both effective and stylish, blending seamlessly into your home decor.
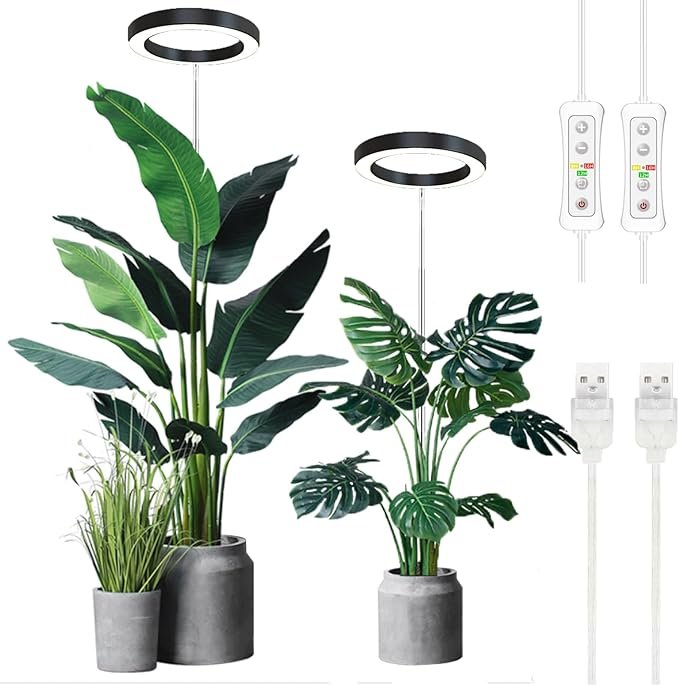
- The Versatile Clip-On Light: These are perfect for beginners or for highlighting a single plant. They typically have one or more adjustable “gooseneck” arms with LED heads that can be precisely aimed. They can clip onto a shelf, a desk, or the side of a plant stand.
- The Stylish Integrated Bulb: These look just like a standard lightbulb and can be screwed into any normal lamp or light fixture (a floor lamp, a pendant light, etc.). This is the best option for seamlessly integrating a grow light into your home’s design without it looking like a science experiment.
- The Powerful Panel Light: For the serious indoor gardener who wants to grow a tray of herbs or start seeds, a flat LED panel provides strong, even light coverage over a larger rectangular area.
- The Under-Cabinet Strip Light: These are thin, low-profile strips of LEDs that are perfect for mounting under a kitchen cabinet to create a thriving indoor herb garden, right where you need it for cooking.
Tip 4: Get the Distance Right
The intensity of light decreases dramatically the further it gets from the source. Placing your grow light at the correct distance from your plant is critical.
- The Problem: Too far, and the light is too weak to be effective. Too close, and you risk burning the leaves (though this is less of a risk with cool-running LEDs).
- The Rule of Thumb: For most LED grow lights, a distance of 6 to 12 inches from the top of the plant is ideal. Start at 12 inches and monitor your plant. If it starts to stretch, move the light a bit closer. If you see any signs of bleaching or scorching, move it further away.
Tip 5: Use a Timer to Automate Your Sunshine
Consistency is key. The most important accessory for your grow light is a simple outlet timer.
- Why You Need It: Plants need a period of darkness to rest and respire, just like they do in nature. Leaving a grow light on 24/7 will stress the plant and can be counterproductive. A timer automates the process, ensuring your plants get a consistent, predictable “day” and “night.”
- How to Use It: Simply plug your light into the timer, and the timer into the wall. Set it to turn on in the morning and off in the evening. This “set it and forget it” approach makes artificial lighting an effortless part of your routine.
Tip 6: Know How Many Hours of Light Your Plants Need
The amount of supplemental light your plants need depends on the type of plant and the amount of natural light it’s already receiving.
- Low-Light Plants (e.g., ZZ Plant, Snake Plant, Pothos): These can survive on less light, but they will thrive with 10-12 hours of total light per day (natural + artificial).
- Medium-Light Plants (e.g., Most Ferns, Calathea, Philodendron): These are happiest with 12-14 hours of bright, indirect light.
- High-Light Plants (e.g., Succulents, Herbs, Fruiting Plants like Tomatoes): These are sun-worshippers and need 14-16 hours of strong, direct light to flourish and produce.
Tip 7: Observe and Adjust
Your plants are the ultimate source of feedback. The final and most important of our indoor gardening lighting tips is to pay attention. Are they growing strong and compact? Is their color vibrant? Or are they still looking a bit pale and leggy? Don’t be afraid to adjust the distance or the duration of your grow light until you find the sweet spot.
Your Green Oasis is Within Reach
Lack of a sun-drenched window is no longer a valid reason to deny yourself the joy of an indoor garden. By understanding your natural light and learning to supplement it with the right artificial source, you can unlock a whole new world of indoor growing possibilities. You can have a thriving herb garden in a basement apartment or a lush tropical jungle in a north-facing studio. Lighting is the key, and now you have the knowledge to use it with confidence.
What has been your biggest lighting challenge in your home? Share your struggles or successes with grow lights in the comments below!