Do you ever feel like you’re in a constant battle with your garden? You pull one patch of weeds, and three more appear overnight. You water faithfully, only to find the soil bone-dry just a day later. If you’re nodding along, I have a simple, game-changing solution for you, and it’s a secret that nature has been using for millennia: mulching.
Mulching is the simple practice of covering the soil around your plants with a layer of material. It’s the ultimate “unplugged” garden routine—a low-effort task that yields incredible results. This article will provide you with easy, practical mulching tips for eco gardening, covering what natural materials to use, how to apply them, and the amazing benefits for your garden and the planet.
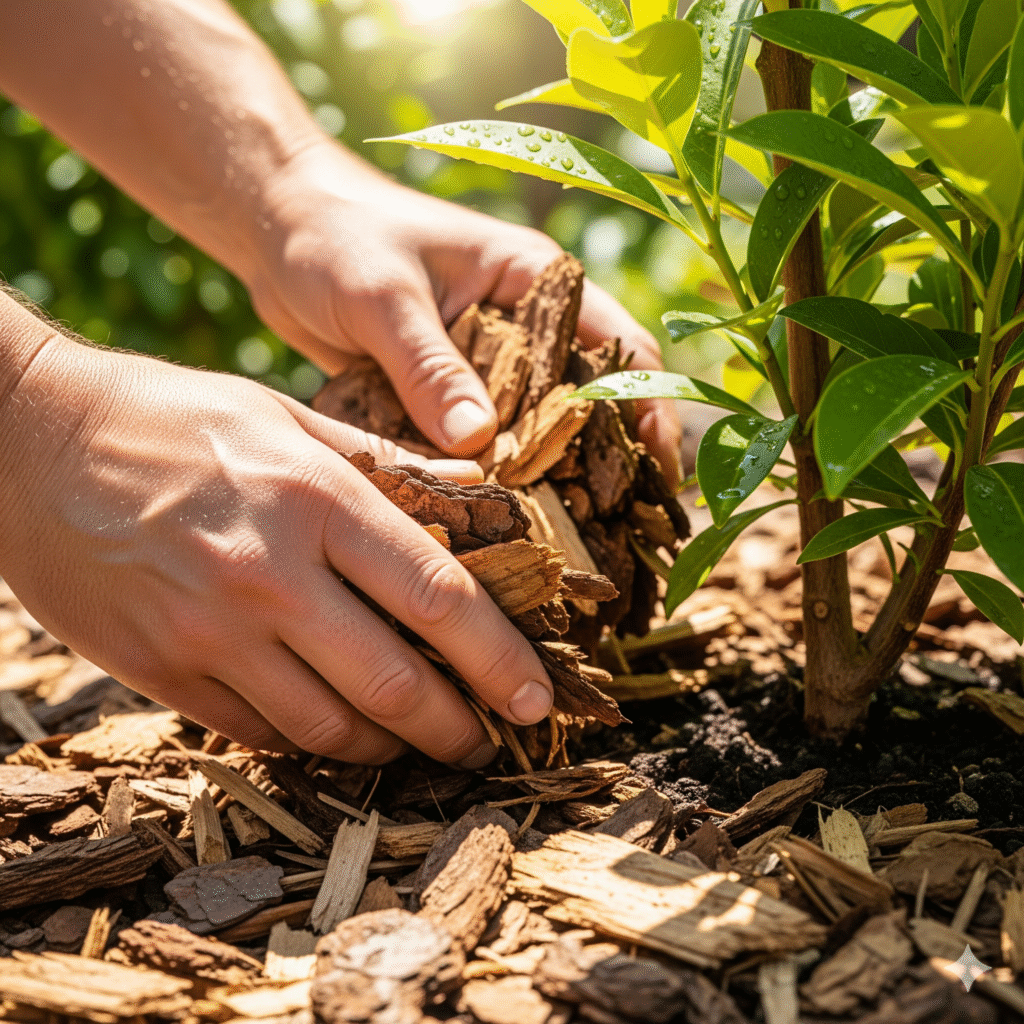
Table of Contents
Why Mulch is an Eco-Gardener’s Secret Weapon
Think of the floor of a healthy forest. It’s never bare; it’s always covered with a rich layer of fallen leaves, twigs, and other organic matter. This is nature’s mulch, and it works wonders. By recreating this in your own garden, you unlock a host of benefits.
Suppresses Weeds Naturally
A 2-4 inch layer of mulch is one of the best ways to achieve natural weed control. It blocks sunlight from reaching pesky weed seeds in the soil, preventing them from sprouting.This means you get to spend less time on your knees pulling weeds and more time enjoying the beauty of your garden.
Conserves Precious Water
Mulch acts like a protective lid on your soil.It dramatically reduces water evaporation caused by the sun and wind. This means your soil stays moist for much longer, cutting down on how often you need to water. It’s a win for you, your water bill, and the environment.
Feeds Your Soil and Plants
This is where the real magic happens. As organic mulch breaks down, it slowly releases a treasure trove of nutrients into the soil. Earthworms and beneficial microbes go to work, pulling this organic matter down, which aerates the ground and improves its structure. Over time, you’re not just covering your soil; you’re actively building rich, fertile, and vibrant soil health.
Regulates Soil Temperature
A layer of mulch acts as insulation.During scorching summer days, it keeps the soil and plant roots cool and comfortable.In the cooler months, it helps retain warmth, protecting your plants from temperature stress and sudden frosts.
Choosing the Best Mulch for Your Garden: An Eco-Friendly Guide
Forget expensive bags from the garden center. The best mulches for eco gardening are often free, repurposed materials from your own home and yard.
From Your Yard
- Grass Clippings: After mowing, don’t bag those clippings! They are high in nitrogen and make a great mulch for vegetable gardens. Just be sure to apply them in thin layers (less than an inch at a time) and let each layer dry before adding more to prevent them from becoming slimy.
- Shredded Leaves: Often called “gardener’s gold,” fallen leaves are one of the best free resources for your garden. While you can certainly shred them by running over a dry pile with a lawnmower, a dedicated tool can make the job much faster and create a finer, more effective mulch. For gardeners who get a lot of leaves each fall, an electric leaf shredder can be a game-changer, quickly turning bulky bags of leaves into a consistent, nutrient-rich mulch that’s perfect for garden beds. This process helps them break down faster and prevents them from forming a matted, water-repellent layer.
- Pine Needles: Also known as pine straw, these are excellent for acid-loving plants like blueberries, azaleas, and hydrangeas. They knit together nicely and stay in place, making them great for sloped areas.

From Your Kitchen
- Compost: While it can be worked into the soil, a layer of finished compost on top is an incredibly nutrient-rich mulch.It feeds your soil like nothing else. Just ensure your compost is fully broken down, otherwise it might contain active weed seeds.
Easy to Source
- Wood Chips/Bark: These are long-lasting and have a tidy, classic look, making them perfect for pathways and around shrubs and trees. As they break down, they can temporarily “use up” nitrogen from the very top layer of soil, so they are best used around established plants rather than new seedlings.
- Straw: Not to be confused with hay (which is full of seeds), straw is a wonderful mulch for vegetable gardens. It’s lightweight, reflects sunlight to keep the soil cool, and keeps produce like strawberries and squash clean. Always look for a certified seed-free source.
How to Mulch Like a Pro: A Simple Step-by-Step Guide
Applying mulch is a simple, mindful activity. Just follow these three steps for perfect results.
Step 1: Weed and Water the Area
Before you begin, give your garden bed a thorough but gentle weeding. Once the area is clear, water it deeply. You want to lock in that moisture under the mulch.
Step 2: Apply Your Mulch
Gently spread your chosen mulch around your plants to a depth of about 2-4 inches (5-10 cm). The most important rule to follow here is the “donut method.” Never pile mulch directly against the stems of your plants or the trunks of trees. Leave a small, mulch-free circle of a few inches around the base. This prevents moisture from getting trapped against the stem, which can lead to rot and disease. Think donut, not volcano!
Step 3: Maintain and Refresh
Because organic mulches are designed to break down and feed the soil, they aren’t permanent.14 You’ll need to top them up with a fresh layer once or twice a year, typically in the spring or fall, to maintain the ideal depth.
Common Mulching Mistakes to Avoid
Mulching is simple, but a few common errors can cause problems. Steer clear of these:
- The “Mulch Volcano”: Piling a huge mound of mulch against the trunk of a tree or shrub. This is a very common mistake that traps moisture and invites pests and disease. Remember the donut!
- Using the Wrong Mulch: Avoid using fresh wood chips in a vegetable garden where you’ll be digging and planting often. Stick to compost or straw that is easier to work with.
- Applying it Too Thick or Too Thin: Too thin (less than an inch) won’t do much to stop weeds or hold moisture. Too thick (more than 4-5 inches) can prevent water and oxygen from reaching the soil.
Frequently Asked Questions About Eco-Mulching
Q: When is the best time of year to apply mulch?
A: The two best times are in mid-to-late spring and in the fall. Applying mulch in the spring after the soil has had a chance to warm up helps to retain moisture for the hot summer months and suppress weeds. Applying a fresh layer in the fall helps protect your soil and plant roots from winter temperature fluctuations.
Q: Will mulch attract pests like termites or slugs?
A: This is a common concern, but the benefits of mulch far outweigh the risks. While a thick, moist layer can provide a habitat for slugs, healthy, strong plants are more resilient to their damage. To minimize risk, always keep mulch a few inches away from the foundation of your house and from the stems of your plants.2 Termites are attracted to wood, not specifically mulch, so keeping mulch away from your home’s foundation is the most important preventative step.
Q: Can I use cardboard as a mulch?
A: Absolutely! Cardboard is a fantastic, eco-friendly tool for sheet mulching, especially for smothering a weedy area. Simply remove all plastic tape and labels, lay the plain cardboard down on top of the weeds (overlapping the edges so no light gets through), wet it thoroughly, and then cover it with a more attractive mulch like leaves, straw, or wood chips. The cardboard will suppress the weeds and eventually decompose, adding organic matter to the soil.
Q: Do I need to remove old mulch before applying a new layer?
A: Generally, no. The beauty of using organic mulch is that it breaks down and becomes part of your soil. There’s no need to remove the old layer. Simply check the depth, and if it has decomposed to less than two inches, you can add a fresh layer right on top.
Q: How do I mulch a garden where I plan to sow seeds directly?
A: This is a great question. You don’t want to sow seeds under a thick layer of mulch. The best method is to pull the mulch back from the specific rows or areas where you intend to plant. Sow your seeds directly into the soil as usual. Once your seedlings have sprouted and are a few inches tall, you can gently push the mulch back around them, being careful not to cover the young plants.
Conclusion
Mulching is more than just a garden chore; it’s an act of partnership with nature. It saves you time, conserves water, eliminates the need for chemical weed killers, and builds the healthy, living soil that is the foundation of any thriving garden.
Ready to give your garden the nourishing blanket it deserves? Start with one small bed this weekend and watch the magic happen. Take a mindful moment to notice how the soil feels and smells as you give it this gift.
What are your favorite eco-friendly mulching tips? Share them in the comments below!